Milling is the most common form of machining, a material removal process, which can create a variety of features on a part by cutting away the unwanted material. The milling process requires a milling machine, workpiece, fixture, and cutter. The workpiece is a piece of pre-shaped material that is secured to the fixture, which itself is attached to a platform inside the milling machine. The cutter is a cutting tool with sharp teeth that is also secured in the milling machine and rotates at high speeds. By feeding the workpiece into the rotating cutter, material is cut away from this workpiece in the form of small chips to create the desired shape.
Milling is typically used to produce parts that are not axially symmetric and have many features, such as holes, slots, pockets, and even three dimensional surface contours. Parts that are fabricated completely through milling often include components that are used in limited quantities, perhaps for prototypes, such as custom designed fasteners or brackets. Another application of milling is the fabrication of tooling for other processes. For example, three-dimensional molds are typically milled. Milling is also commonly used as a secondary process to add or refine features on parts that were manufactured using a different process. Due to the high tolerances and surface finishes that milling can offer, it is ideal for adding precision features to a part whose basic shape has already been formed.
Process Cycle
The time required to produce a given quantity of parts includes the initial setup time and the cycle time for each part. The setup time is composed of the time to setup the milling machine, plan the tool movements (whether performed manually or by machine), and install the fixture device into the milling machine. The cycle time can be divided into the following four times:
Load/Unload time - The time required to load the workpiece into the milling machine and secure it to the fixture, as well as the time to unload the finished part. The load time can depend on the size, weight, and complexity of the workpiece, as well as the type of fixture.
Cut time - The time required for the cutter to make all the necessary cuts in the workpiece for each operation. The cut time for any given operation is calculated by dividing the total cut length for that operation by the feed rate, which is the speed of the cutter relative to the workpiece.
Idle time - Also referred to as non-productive time, this is the time required for any tasks that occur during the process cycle that do not engage the workpiece and therefore remove material. This idle time includes the tool approaching and retracting from the workpiece, tool movements between features, adjusting machine settings, and changing tools.
Tool replacement time - The time required to replace a tool that has exceeded its lifetime and therefore become to worn to cut effectively. This time is typically not performed in every cycle, but rather only after the lifetime of the tool has been reached. In determining the cycle time, the tool replacement time is adjusted for the production of a single part by multiplying by the frequency of a tool replacement, which is the cut time divided by the tool lifetime.
Following the milling process cycle, there is no post processing that is required. However, secondary processes may be used to improve the surface finish of the part if it is required. The scrap material, in the form of small material chips cut from the workpiece, is propelled away from the workpiece by the motion of the cutter and the spraying of lubricant. Therefore, no process cycle step is required to remove the scrap material, which can be collected and discarded after the production.
Cutting parameters
In milling, the speed and motion of the cutting tool is specified through several parameters. These parameters are selected for each operation based upon the workpiece material, tool material, tool size, and more.
Cutting feed - The distance that the cutting tool or workpiece advances during one revolution of the spindle and tool, measured in inches per revolution (IPR). In some operations the tool feeds into the workpiece and in others the workpiece feeds into the tool. For a multi-point tool, the cutting feed is also equal to the feed per tooth, measured in inches per tooth (IPT), multiplied by the number of teeth on the cutting tool.
Cutting speed - The speed of the workpiece surface relative to the edge of the cutting tool during a cut, measured in surface feet per minute (SFM).
Spindle speed - The rotational speed of the spindle and tool in revolutions per minute (RPM). The spindle speed is equal to the cutting speed divided by the circumference of the tool.
Feed rate - The speed of the cutting tool's movement relative to the workpiece as the tool makes a cut. The feed rate is measured in inches per minute (IPM) and is the product of the cutting feed (IPR) and the spindle speed (RPM).
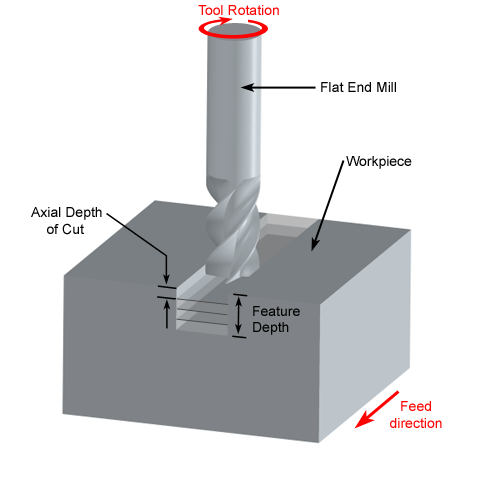
Axial depth of cut - The depth of the tool along its axis in the workpiece as it makes a cut. A large axial depth of cut will require a low feed rate, or else it will result in a high load on the tool and reduce the tool life. Therefore, a feature is typically machined in several passes as the tool moves to the specified axial depth of cut for each pass.
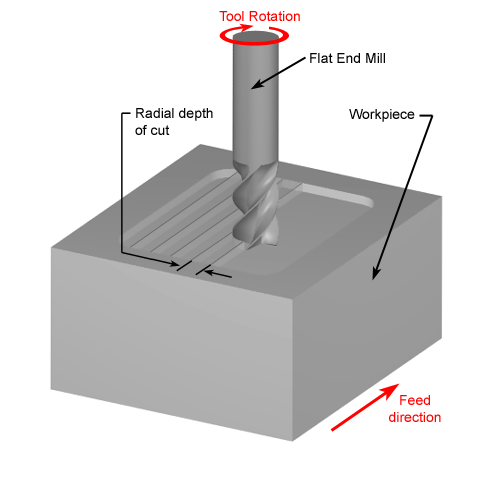
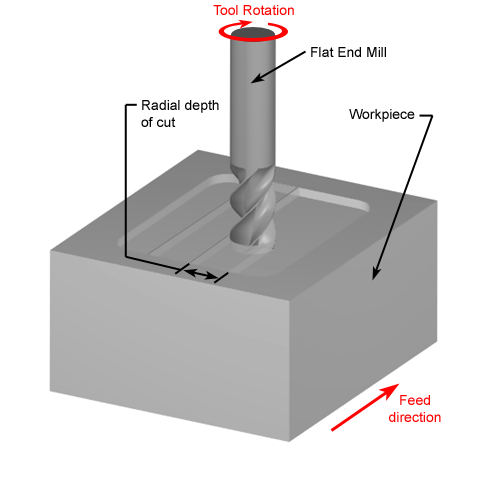
Radial depth of cut - The depth of the tool along its radius in the workpiece as it makes a cut. If the radial depth of cut is less than the tool radius, the tool is only partially engaged and is making a peripheral cut. If the radial depth of cut is equal to the tool diameter, the cutting tool is fully engaged and is making a slot cut. A large radial depth of cut will require a low feed rate, or else it will result in a high load on the tool and reduce the tool life. Therefore, a feature is often machined in several steps as the tool moves over the step-over distance, and makes another cut at the radial depth of cut.
Operations
During the process cycle, a variety of operations may be performed to the workpiece to yield the desired part shape. The following operations are each defined by the type of cutter used and the path of that cutter to remove material from the workpiece.
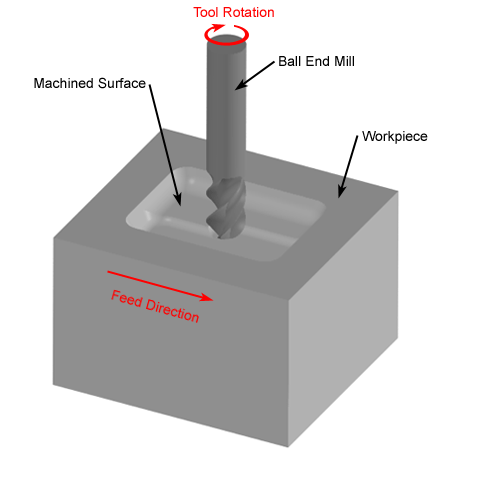
End milling - An end mill makes either peripheral or slot cuts, determined by the step-over distance, across the workpiece in order to machine a specified feature, such as a profile, slot, pocket, or even a complex surface contour. The depth of the feature may be machined in a single pass or may be reached by machining at a smaller axial depth of cut and making multiple passes.
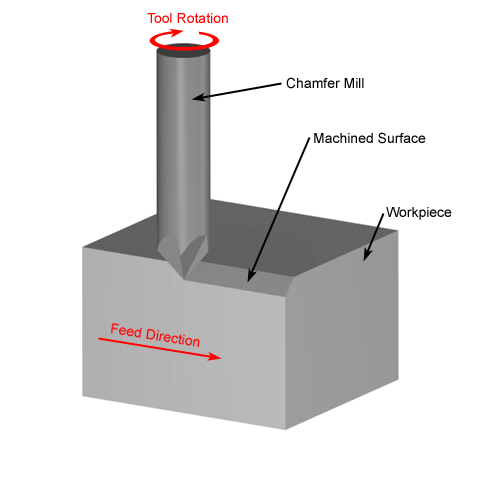
Chamfer milling - A chamfer end mill makes a peripheral cut along an edge of the workpiece or a feature to create an angled surface, known as a chamfer. This chamfer, typically with a 45 degree angle, can be machined on either the exterior or interior of a part and can follow either a straight or curved path.
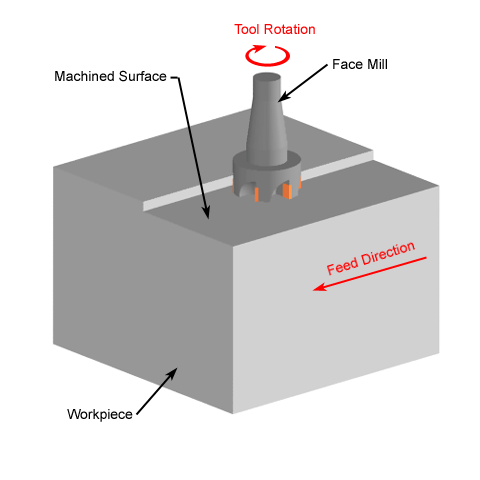
Face milling - A face mill machines a flat surface of the workpiece in order to provide a smooth finish. The depth of the face, typically very small, may be machined in a single pass or may be reached by machining at a smaller axial depth of cut and making multiple passes.
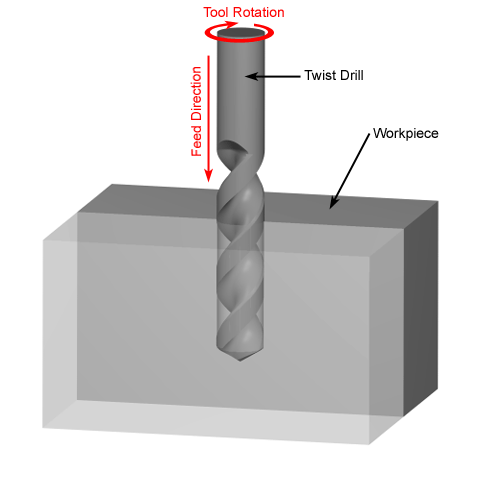
Drilling - A drill enters the workpiece axially and cuts a hole with a diameter equal to that of the tool. A drilling operation can produce a blind hole, which extends to some depth inside the workpiece, or a through hole, which extends completely through the workpiece.
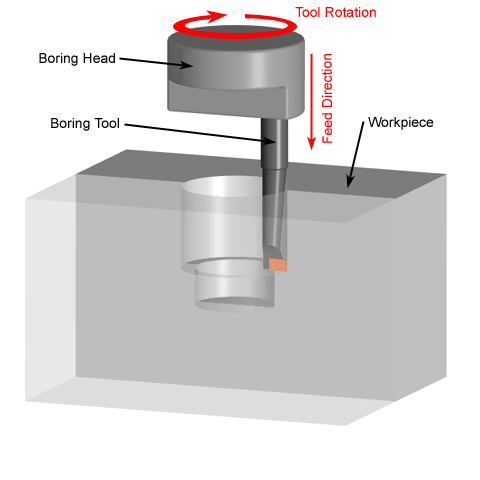
Boring - A boring tool enters the workpiece axially and cuts along an internal surface to form different features. The boring tool is a single-point cutting tool, which can be set to cut the desired diameter by using an adjustable boring head. Boring is commonly performed after drilling a hole in order to enlarge the diameter or obtain more precise dimensions.
Counterboring - An counterbore tool enters the workpiece axially and enlarges the top portion of an existing hole to the diameter of the tool. Counterboring is often performed after drilling to provide space for the head of a fastener, such as a bolt, to sit below the surface of a part. The counterboring tool has a pilot on the end to guide it straight into the existing hole.
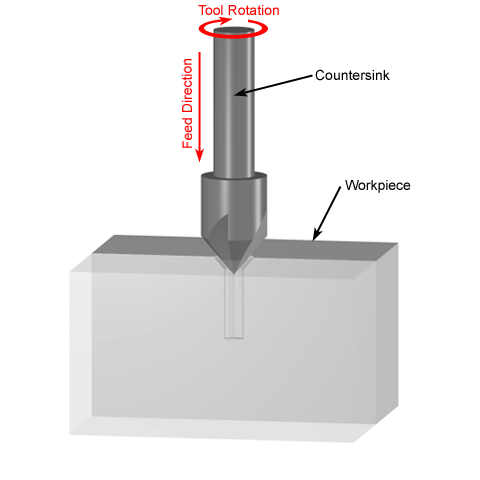
Countersinking - A countersink tool enters the workpiece axially and enlarges the top portion of an existing hole to a cone-shaped opening. Countersinking is often performed after drilling to provide space for the head of a fastener, such as a screw, to sit flush with the workpiece surface. Common included angles for a countersink include 60, 82, 90, 100, 118, and 120 degrees.

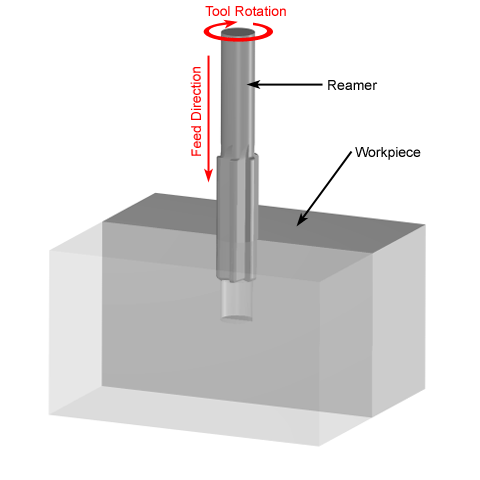
Reaming - A reamer enters the workpiece axially and enlarges an existing hole to the diameter of the tool. Reaming removes a minimal amount of material and is often performed after drilling to obtain both a more accurate diameter and a smoother internal finish.
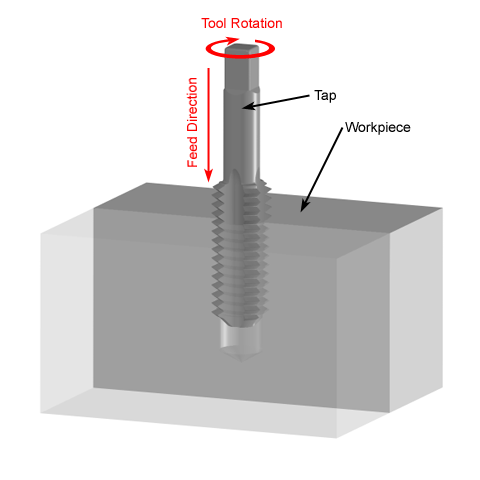
Tapping - A tap enters the workpiece axially and cuts internal threads into an existing hole. The existing hole is typically drilled by the required tap drill size that will accommodate the desired tap. Threads may be cut to a specified depth inside the hole (bottom tap) or the complete depth of a through hole (through tap).
Copyright © Jiangsu Hoston Machine Tools Co., Ltd. (Hongkong Hoston Group CO., LIMITED)All Rights Reserved | Sitemap Technical Support: 